For the Epson DC-06 document camera locate the USB cable that came with the camera and connect it to the to the projectors USB-A port and to the document cameras USB Type B port. Number of Views 214K.

Hooking Up A Document Camera Aver Media Youtube
This video accompanies the video on using the AVer Document Camera to capture video of your instructionIf you have any other document camera this may look.
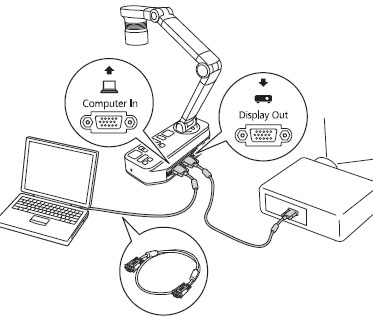
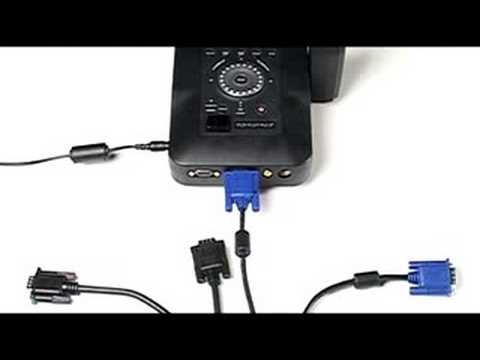
. Connect the other end of the long cable to the VGA or RGB input on the document camera. You will not have to disconnect and re-connect any cables. The best way to connect a desktop computer to a document cameraprojector is with the use of a long VGA cable and Y splitter cable.
Choose CameraSelect your built in face camera. My Document Camera software says Visualizer not connected. Select your AVer document camera as your visualizer and you are successfully connected.
Depending on your document camera model do one of the following to connect the document camera to your projector. In this way you can still see you monitor image when not using the projector. Depending on your document camera model some may need to be plugged in and powered on while others will be powered by the USB connection to.
Connect the document camera to the computer with the USB cord. Click Share on the bottom right corner. To project from your laptop press the PC Button To project from your AverVision press the Camera Button.
Send the signal from your laptop. Also see Transfer Image from AVerVision CP150 to PC. Finding the CD that came with the camera is often a lost cause but all of the manufacturers of document cameras have software download areas on their websites where you can obtain the.
Remove the monitor cable from the back of the. How to Connect the AverMedia document camera to the SMARTBoard Windows only First make sure youve downloaded the Avervision software for your document camera. Locate the USB port of the computer or laptop and connect it to USB port of CP300.
Join a video meeting. On the document camera Press Menu Advance USB Select IMG download right arrow. In your computer locate the hard drive and the copycutpaste the images to your computer.
How do I connect my avermedia camera to my laptop. How do I connect my document camera for distanced learning. If your doc cam has a PC CAM USB flash drive switch on the side move it to PC CAM to enable software connection.
Connect your AVer doc cam to your computer using the included USB cable. Please find below instructions on how to connect your Avervision150 purchased before 2008 the Avervision CP150 and the AverVision CP155 document camera to your computer and video projector in order to utilize the software to capture pictures and video. For the Epson DC-11 document camera connect it to the projectors.
Depending on the model of your doc cam you will need to connect either Mini-USB cable or Type AB USB cable. To reset your Unit back to a document camera unplug and re-plug the power cord. In the bottom select.
Number of Views 284. Keep Sphere2 software open on your desktop. This enables you to use CP150 as a USB Camera and to transfer the captured images from the memory and to computer.
Open up your software of choice and connect your AVer document camera to your computer via USB cable. To connect Document Camera directly to a computer the user will need a USB cable and download proper Lumens Ladibug Software 2. Locate the USB port of the computer or laptop and connect it to USB port of CP150.
If this happens disconnect Y splitter and reconnect monitor cable. Connect Document Camera power cable to document camera and plug into electrical outlet. Connecting your AVer document camera with Zoom.
Sphere Lite Chrome extension. Which AVer software to download for my document camera. Please refer to Zoom Skype or Hangout user.
Now connect the USB cable between the AVerVision Document Camera and the computer. If any cables are disconnected from the setup the monitor image may become blurry. If your camera is working to the right of Video youll see your video feed.
F17-8M Document Camera Troubleshooting. This enables you to use CP300 as a USB Camera and to transfer the captured images from the memory and to computer. Select Your desktop screen.
Number of Views 139K. How to setup your Avervision Document Camera. This short training video from Document Camera Experts will show you how to connect the AVerMedia AVerVision CP300 document camera to a projector.
Connect the document camera to. Ensure your Document Camera the dedicated power cord VGA cable andor HDMI cable. About Press Copyright Contact us Creators Advertise Developers Terms Privacy Policy Safety How YouTube works Test new features Press Copyright Contact us Creators.
Next you need the software. Download the correct software according to the guide. It will have a standard flat USB plug on the end that connects to the computer and a more square-shaped plug that connects to the document camera.
Also attached is a pdf file with images and step-by-step. Also see Transfer Image from AVerVision CP300 to. Open up your software of choice and connect your AVer document camera to your computer via USB cable.
AVer document camera USB cable Desktoplaptop computer Zoom account 1. Select your AVer document camera as your visualizer and you are successfully connected. Select your AVer document camera as your visualizer and you are successfully connected.
Use the CD or download from this website. USB cable Computer Laptop MAC Installing the Optional Light Box. Connect the VGA Out on the AVerVision with Computer 1 on the projector.
Faq 292491 Spt V12h758020 Epson Elpdc21 Document Camera Document Cameras Projectors Support Epson Us

Connecting Your Avervision To Your Computer And Projector
2

Setup Of Avermedia Cp 155 Document Camera Youtube
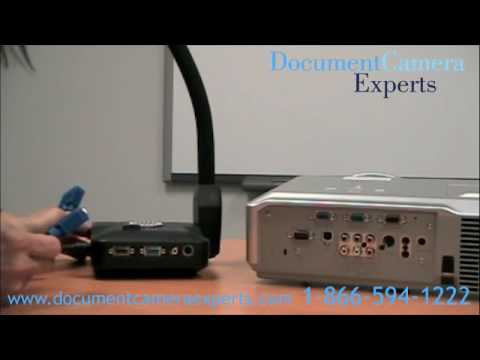
How To Connect An Avermedia Avervision Cp300 Document Camera To A Projector Youtube

Office Depot
2
Avervision Cp300 Document Camera Training Video Getting Started Youtube
0 comments
Post a Comment